Jason J Lee
FittingRoom Postmortem
Trying on new clothes takes too much time and effort. You have to go to the store, find the clothes you like, try them on in the fitting room and probably put it back. If you’re a misshapen human like me, it takes even more time to find something that looks nice. This is more of a problem if you shop online for clothes. Now you don’t even get a chance to try it on before you buy it which leads to more guesswork and most likely shipping waste.
Now with FittingRoom, you can digitally try on clothes saving you all this time and effort in trying it on yourself!
From this
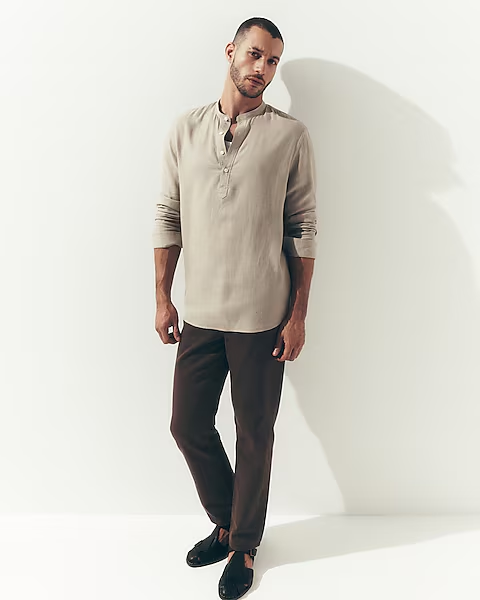
Wearing this
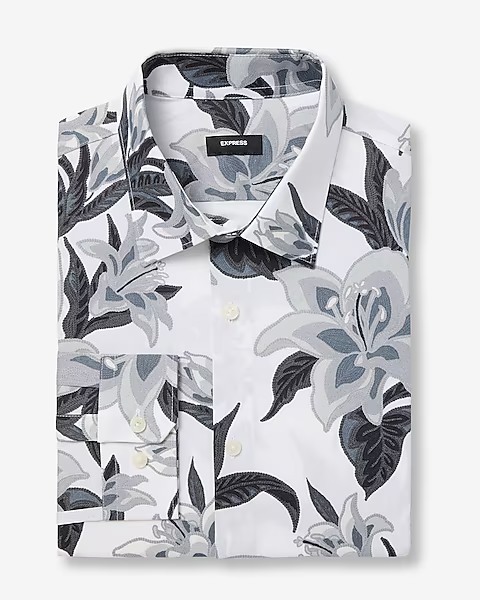
To this

Oh God.
How it works
These are just off the shelf models from huggingface glued together to make something barely coherent. All images were generated on a M2 Macbook Pro which can explain some of the limitation on the total number of steps I can apply during image generation / refinement.
The script takes 3 core inputs
- Source image - This is you in your normal clothes
- Inspo image - This is the clothing or design you want to wear
- Face image - This is your face portrait. We’ll talk about why we need this one.
Originally I stumbled on a model called ControlNet. ControlNet allows for finer control over the generated image given some properties of the image (outlines, depth map, color maps, …). Without ControlNet, there would be no foundation for what the generated image would look like and would produce wildly varying results with no semblance of looking like the original.
ControlNet provides a depth pre-processor. I thought this would be a good foundation for building an inspired image while maintaining the original pose.
From this
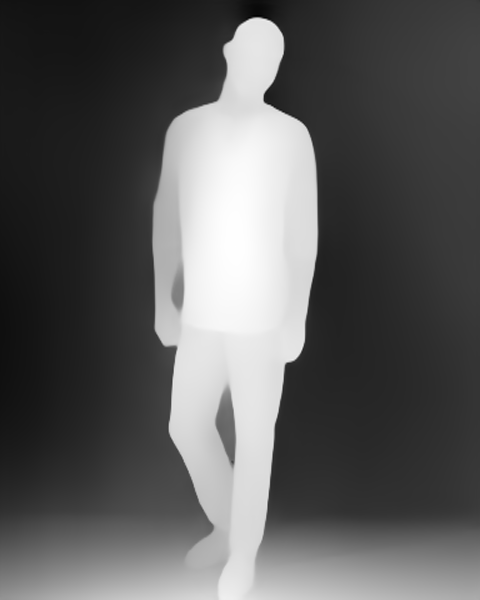
To this
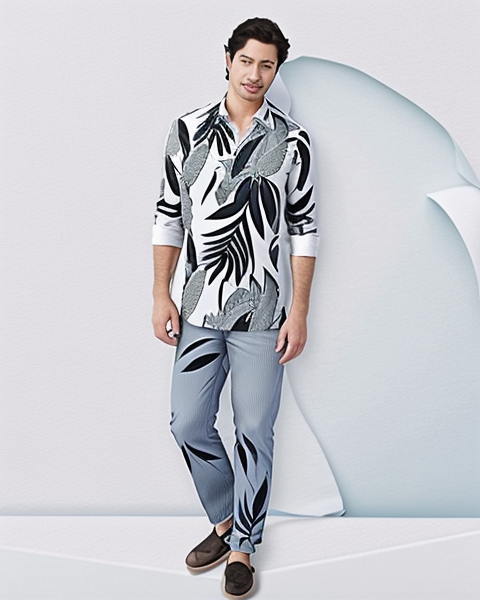
Wait, that blurry looking face looks nothing like the original model.
So the model uses the depth map as a foundation but really has no idea what the face should look like. Fortunately another tool, IPAdapter provides a feature that given an image mask, it’ll fill in the lost details (demo). We can use this mask to blank out the incorrect face and replace it back with some form of the original face. We use a very rudimentary face recognition library and create a simple box mask around the detected face of the generated image. Then we ask IPAdapter to fill that in.
From this

With this face portrait
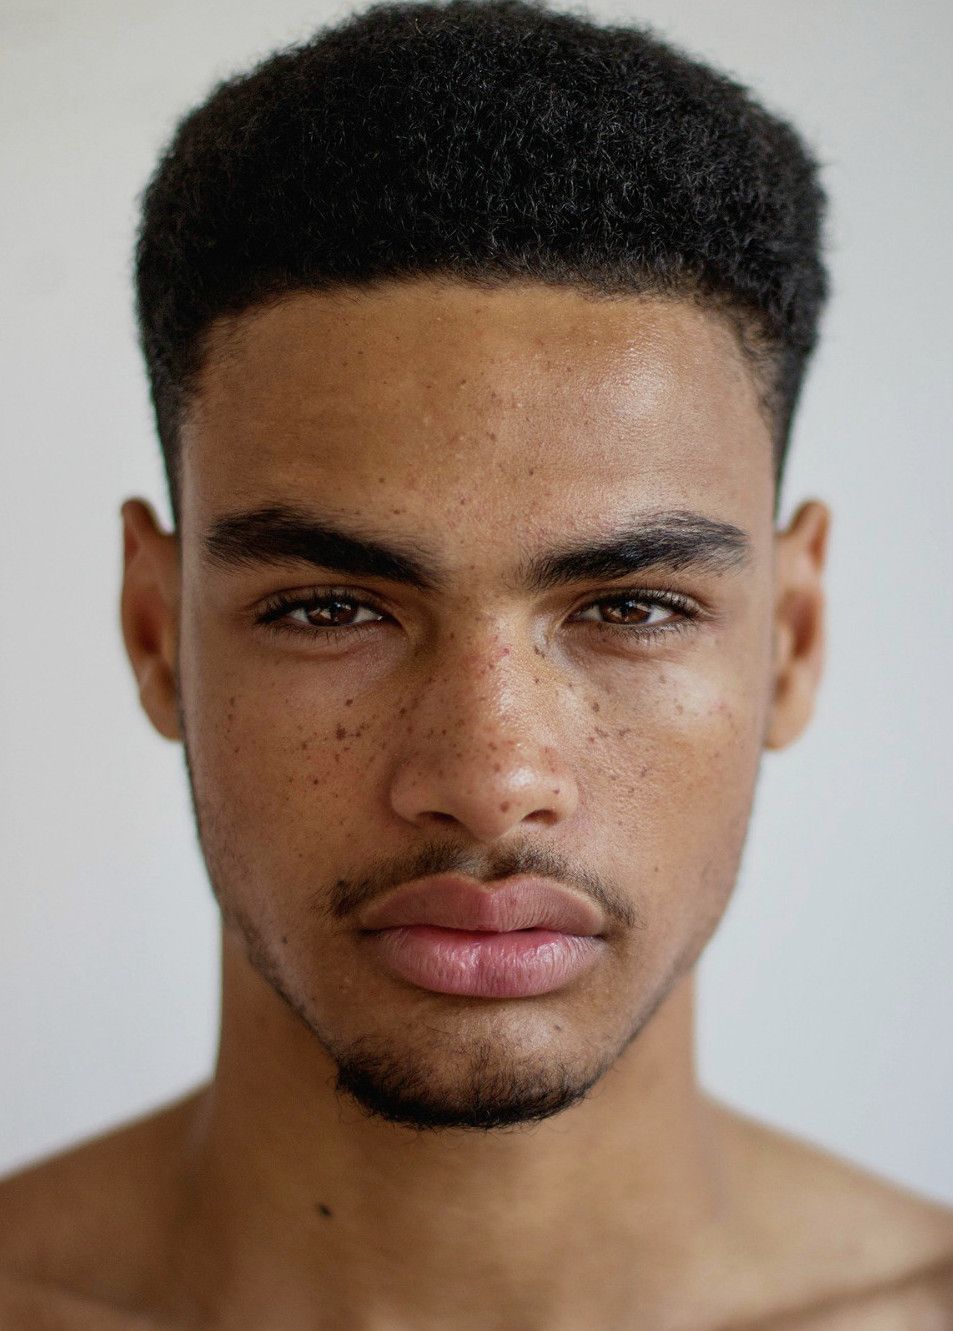
To this

Jesus…
In the above example, I picked a random headshot but imagine if the headshot is the same as the original model in the source image.
Things to try out
So these images were generated using a smaller Stable Diffusion 1.5 with when we could have used the much larger Stable Diffusion XL model. The XL models from my experience generate much more sensible and higher quality images at the cost of time and memory. I wasn’t able to successfully generate a fitting room picture using the highest quality model locally due to memory constraints. I also set the amount of steps to around 80. Setting it any higher would mean I would be waiting more than 5 minutes to generate a single picture. I did notice in testing that a higher amount of steps would produce a higher quality image at the expense of me context switching by walking away from the laptop waiting for the process to complete.
And of course the face masking could be more accurate. I really just wanted to run a POC and was fine with the square mask placed over where the face detector was, but more accurate shaping of the face mask would have of course produced a higher quality result.
So does it work?
I think it can work. I’m going to guess that with a higher fidelity model we can get it to look incredibly uncanny. Face swapped portraits have existed and those can look imperceptively real. I’m certain that using a higher quality model can achieve the same result.